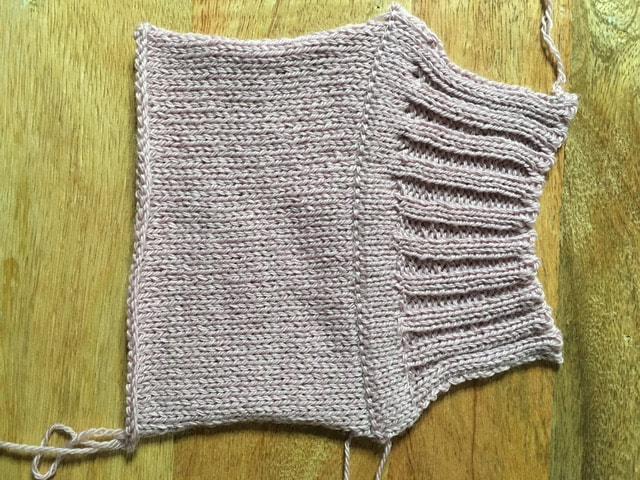
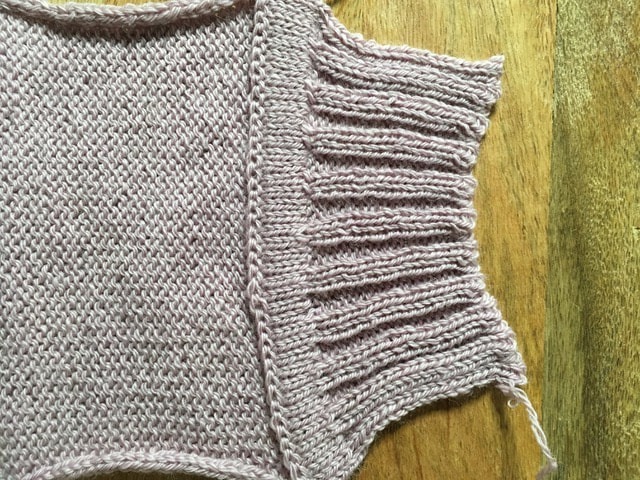
How to pocket the neckline (or any other edge)
(Instruction by Olga T.)
- Pocketing feels awkward because you hang your garment onto the needles upside down. At the same time it is a very neat and clean way to work the edges, including pockets, waistline, armholes. Depending on the type of the band, you can do it on a single bed machine or use a ribber for ribbed bands.
For the purpose of this demo I pre-made a 2-by-2 rib using my ribber at home to avoid any failure that can happen while demoing)).
I am including the instructions how to work it herewith, do not worry.
STEP 1. Measuring the width of the neckline
In order to identify how many needles I need to put into working, I’d normally fold the edge I’m working on in halves and, stretching it slightly, spread it along the main bed needles, starting from “0” mark (pic 1). This will give me at the number of stitches to cast on on each side from zero.
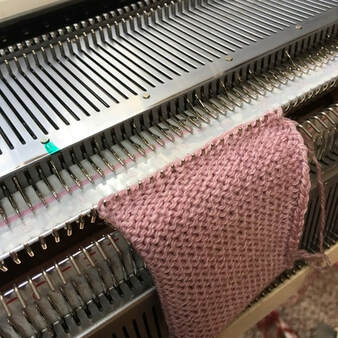
Fig. 1
In my case, the swatch was 40 stitches wide and it gave me 40 sts to cast on for the neckline. I added one more stitch on each side to allow for a nice seam afterwords.
STEP 2. Knit the collar
Now that you know the number of stitches, knit your collar same way you did the cuffs of the sleeves or the bottom of the garment. I did 20 rows on tension 5/5 (my stockinette tension was 8).
STEP 3. Knit the pocket
I know at least three ways to start the pocket they all give you different transition from ribbing to circular knitting.
3.1. Will leave no holes at all, look very neat and professional, but takes lots of efforts and if something goes wrong, you’d feel so bad of spending your time picking up those tiny little loops.
Move all needles into working position. By picking up the bottom of the stitch (Fig 2 and 3) and transferring it to another bed, make sure all needles have a stitch. Then, 1 full rib row at ribbing tension and after that start circular knitting at stockinette tension.
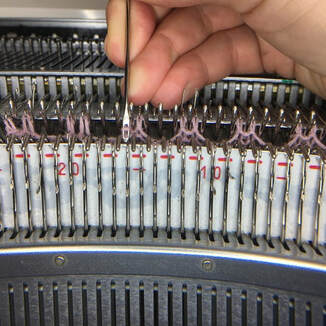
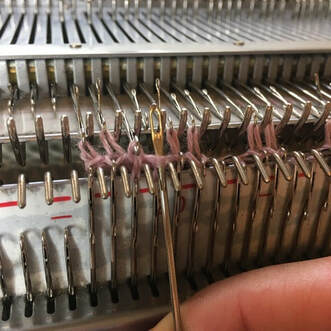
3.2. Leaves huge holes but fast and easy.
Move all needles into working position, knit one full rib row and ribbing tension reduced by at least 3 points and after that start circular knitting at stockinette tension.
For example, my ribbing tension is 5/5, stockinette – 8.
After putting all needled into working position, I knit one full rib row at tension 2/2, one circular row 5/5, then continue in circular knitting at tension 8/8.
3.3. Recommended – I see no holes, fast, easy, looks just fine for me.
Move all needles into working position, knit 1 circular row and ribbing tension the start circular knitting at stockinette tension.
When your pocket is 1/2 – 1 inch deep, lower your ribber to the mid-down position (Fig 4).
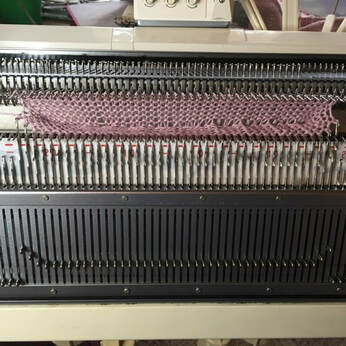
Fig. 4 – YOUR POCKET IS READY
STEP 4. Hanging on your garment.
Very important here – make sure your garment is facing you with the right side!!! I got so annoyed when I once finished pocketing and realized I put my sweater wrong side out.
One other thing to remember – when you spread the edge of your garment along the needles, do not use the last needles on each side to allow for seaming.
So, you take your garment, right side and the edge you are working on both facing you, and hang it over the main bed needles. Some people recommend using transfer tools for this. I could not make use of any instrument, so I just use my hands as if I was hanging it onto the linking machine. The difference would be the garment is upside down (Fig 5, 6).
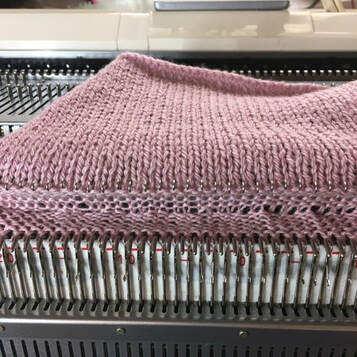
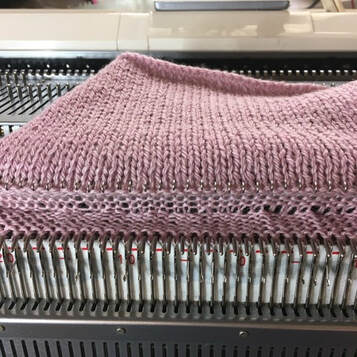
STEP 5. Transferring all the stitches onto the main bed
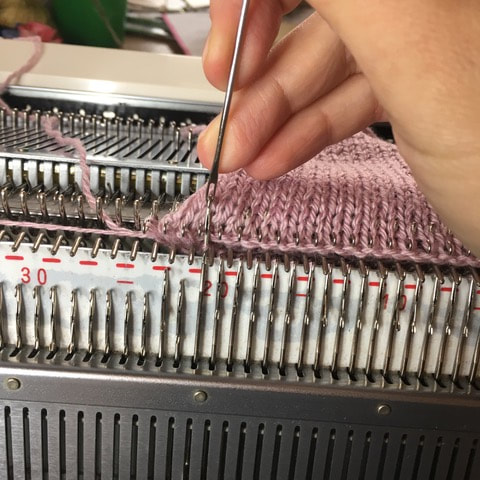
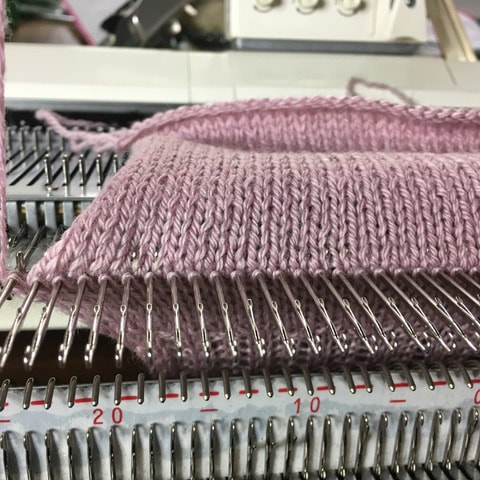
Using the transfer needle, transfer all sts onto the main bed. Each needle now has two stitches on it and the garment in between them (Fig 7). Move all needles into front non-working position (Fig 8).
STEP 6. Close the latches
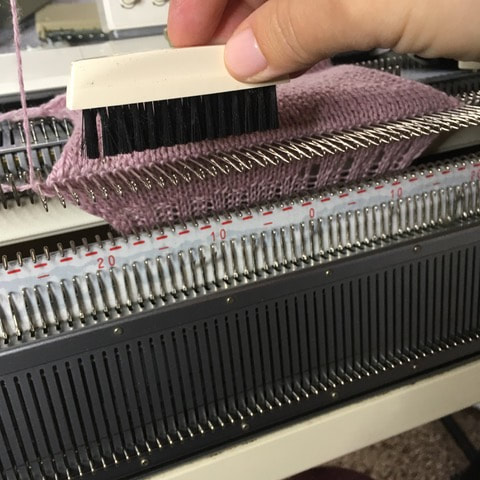
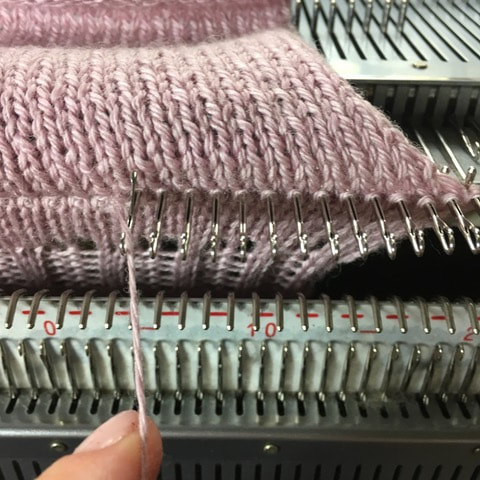
Using a brush or a magnet close the latches. Otherwise you risk dropping some stitches in the next step (pic 9, 10).
STEP 7. Hand knit all the stitches.
This step is an important part of the demo.
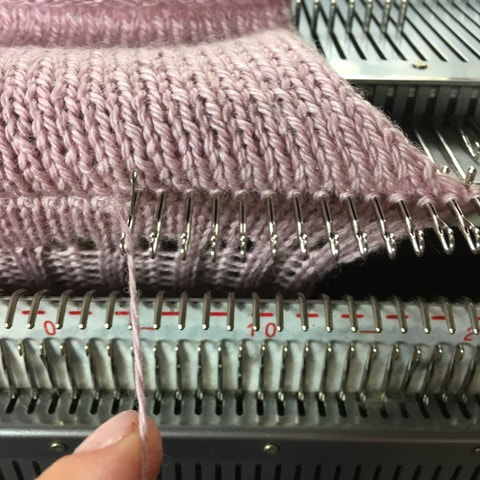
VERY IMPORTANT: make sure the hand knitted loops are of right tension. They tend to be to tight. Also make sure they are of the same, or at least similar tension. Some people put a ruler to ensure all stitches are same. This never worked for me. With some practice you’ll feel what the right tension will be for your yarn.
How to hand knit?
Move your needles slightly backwards into “D” position or near that. Put the yarn from the carriage inside the needle under the latch (Fig 11) and pull the needle all the way backward. You made a stitch. Work all the stitches the same way.
STEP 8. Finishing
Flip the work over the needles towards you. Finally, we see something we are used to when working on the machine.
Now you can cast off the stitches you already have. They may happen to be tight (see step 7). In this case, I suggest you knit across and cast off using your favorite method.
You are all set (Fig 12 front, 13 back)
